

Table of Contents
A well-structured Shopify store isn’t just about showcasing products; it’s about creating a seamless customer experience. One key element that can elevate your site’s navigation and professionalism is the use of subpages. If you are wondering how to make subpages in Shopify, you are in the right place.
This guide will walk you through the entire process, from creation to customization, to make it easy for you to follow. Whether you are a beginner or looking to refine your store, mastering how to create subpages in Shopify will help you organize content, such as FAQs, policies, and about pages, ultimately driving better engagement and conversions.
What are Subpages In Shopify?
Subpages in Shopify are secondary pages that support the main content of your store. These pages usually provide important static or informational content that shoppers may need to reference. Common examples include About Us, Contact, FAQ, Shipping Policy, Refund Policy, and other supporting pages.
What is the Importance of Subpages in Shopify?
Understanding how to make subpages in Shopify is crucial because they serve multiple purposes that enhance your overall e-commerce strategy.
- Provide Essential Business Information: Subpages enable you to share key details about your brand, including your story, mission, values, and contact information, helping customers connect with your business on a deeper level.
- Build Customer Trust and Credibility: Transparent pages, such as your Privacy Policy, Terms of Service, and Return Policy, reassure visitors about your store’s legitimacy, reducing bounce rates and fostering loyalty.
- Organize Content for Better Navigation: By grouping related info into subpages, you keep your main menu clean, making it easier for users to find what they need without overwhelming your homepage.
- Enhance Customer Experience: Dedicated subpages for FAQs, shipping guides, or tutorials answer common questions quickly, minimizing support tickets and boosting satisfaction.
- Improve Search Engine Optimization (SEO): Well-optimized subpages with relevant keywords can attract organic traffic, and they help search engines crawl your site structure more effectively.
- Support Various Content Types: Shopify subpages can incorporate text, images, videos, links, and embeds (like Google Maps), allowing for rich, interactive content.
- Flexibility and Customization: You can create an unlimited number of subpages tailored to your brand, ensuring your store evolves in line with your business needs.
In essence, learning how to make subpages in Shopify empowers you to create a more organized, trustworthy, and engaging online presence.
How to Make Subpages in Shopify?
Creating subpages in Shopify is straightforward and can be done directly from your admin dashboard. This step-by-step guide on creating subpages in Shopify will help you build them efficiently, with options for customization and seamless navigation integration.
1) Log in to your Shopify admin: Access your Shopify account at admin.shopify.com and enter your credentials.
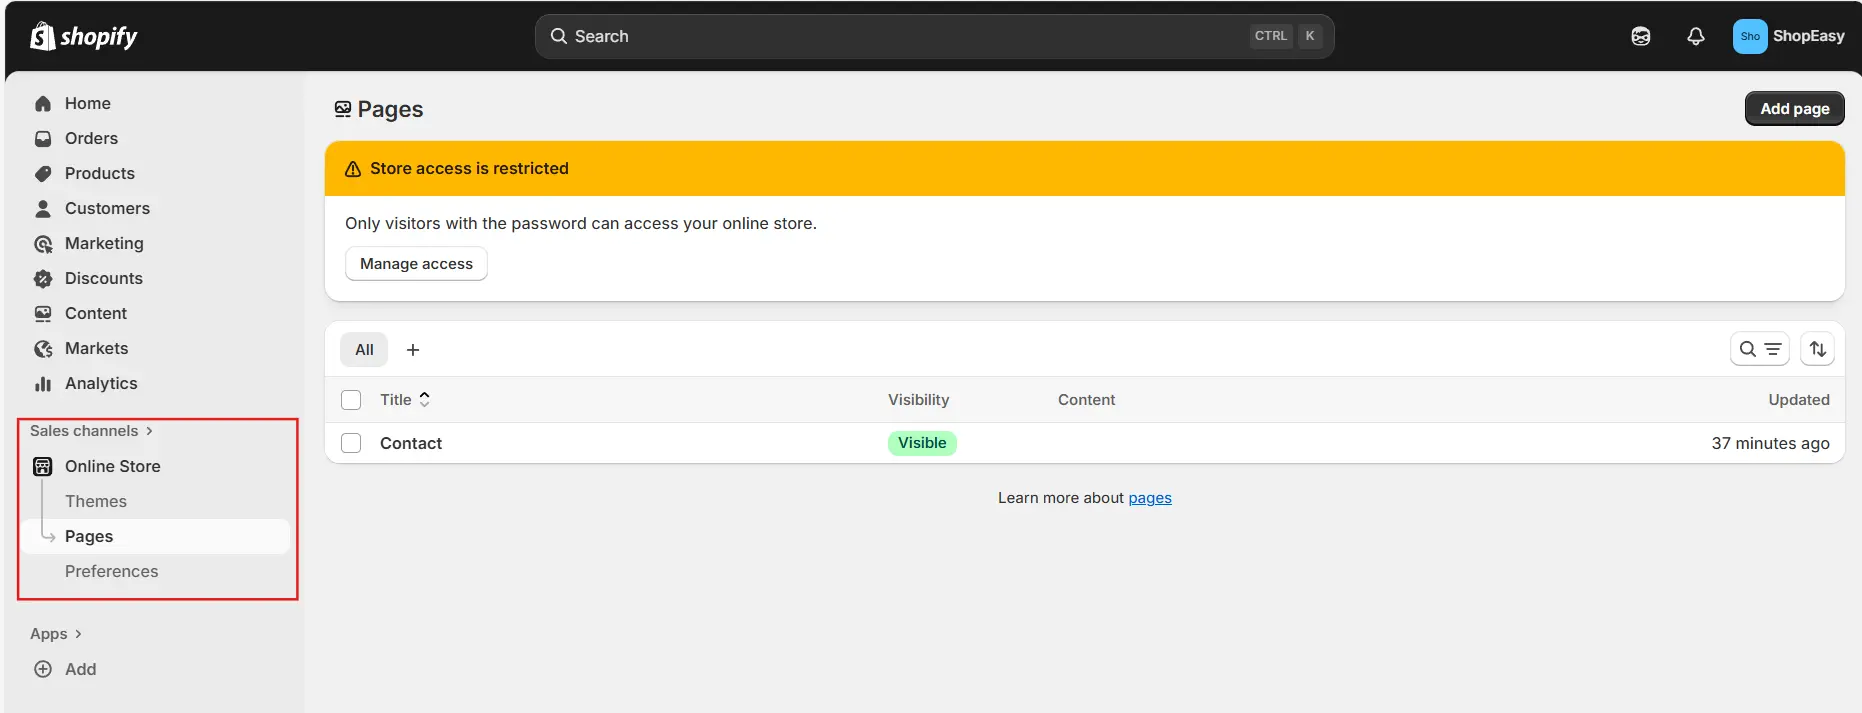
2) Navigate to Pages: From the dashboard, click on “Online Store” in the left sidebar, then select “Pages”.
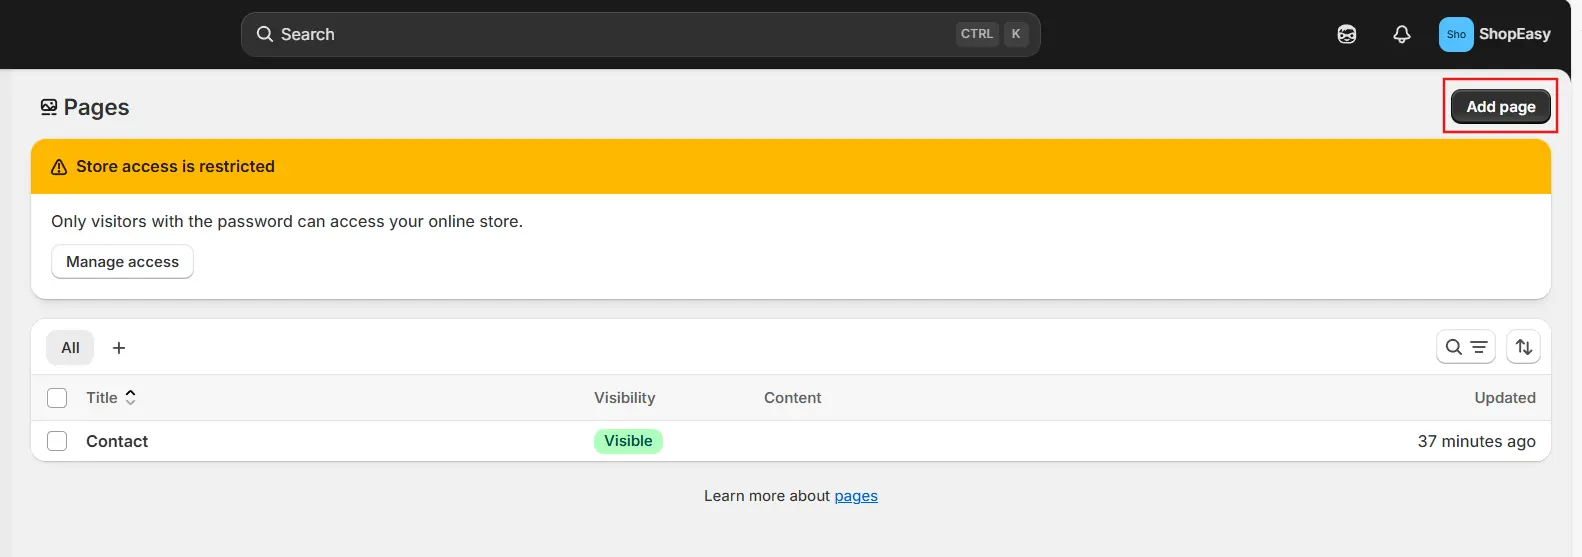
3) Add a new page: Click the “Add page” button to start creating your subpage.
4) Enter page details:
- Title: Choose a clear, descriptive title (e.g., “About Us” or “Shipping Information”) that reflects the page’s purpose.
- Content: Use the rich text editor to add text, images, videos, links, or other elements. For advanced users, switch to the HTML editor to insert custom code
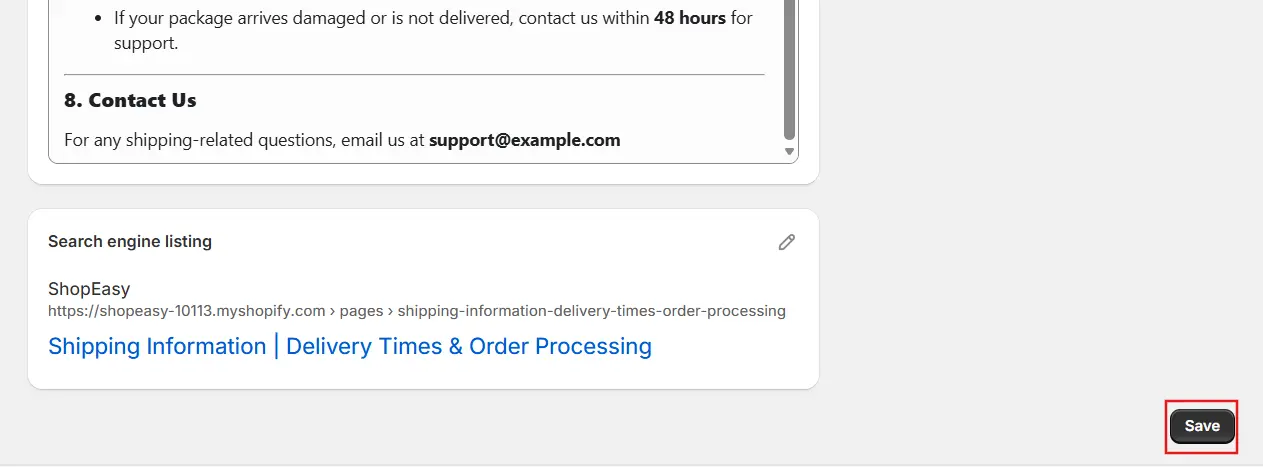
5) Set page visibility: Select “Visible” to publish immediately, or “Hidden” if you want to schedule it later.

6) Save the page: Click “Save” to finalize your new subpage.
7) Organize subpages in navigation menus:
- Go to “Content” > “Menus” in your admin.
- Select the relevant menu (e.g., Main menu or Footer menu).

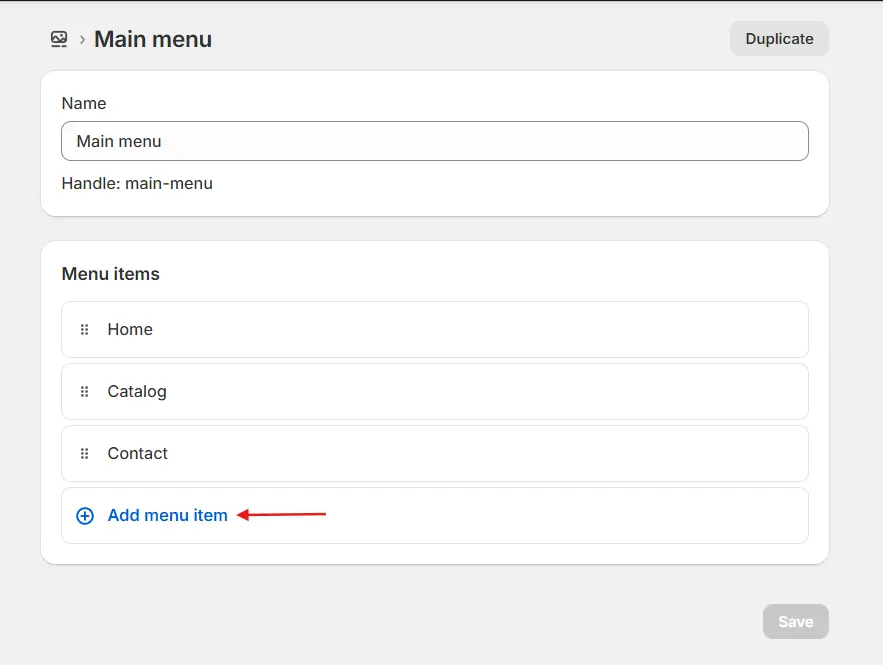
- Click “Add menu item”.
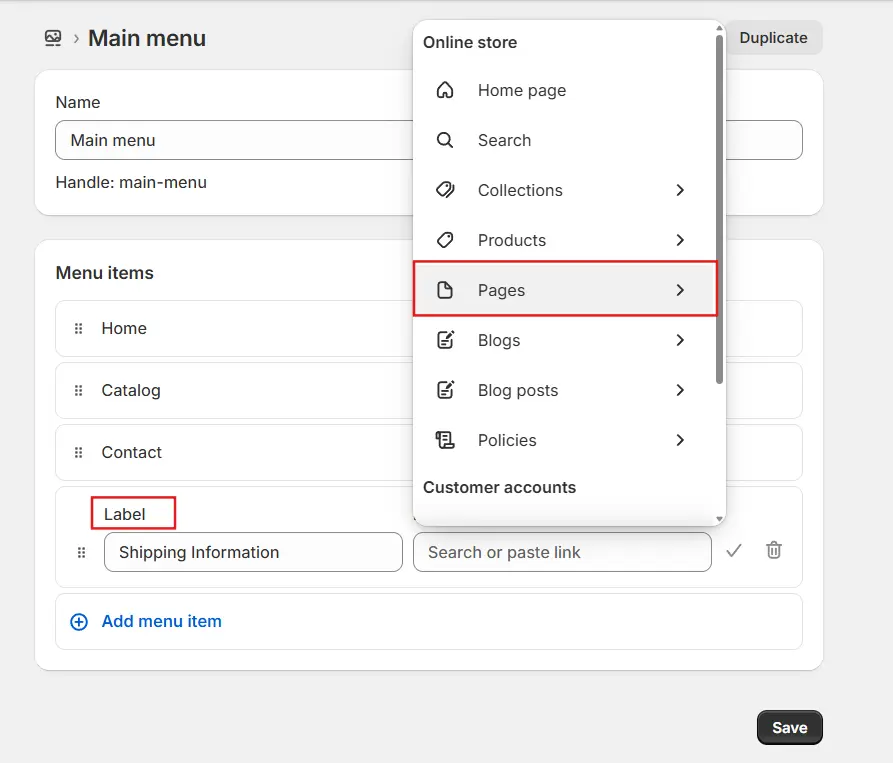
- Enter a name for the menu item (e.g., “About Us”).
- In the “Link” field, choose “Pages” and select your newly created page.
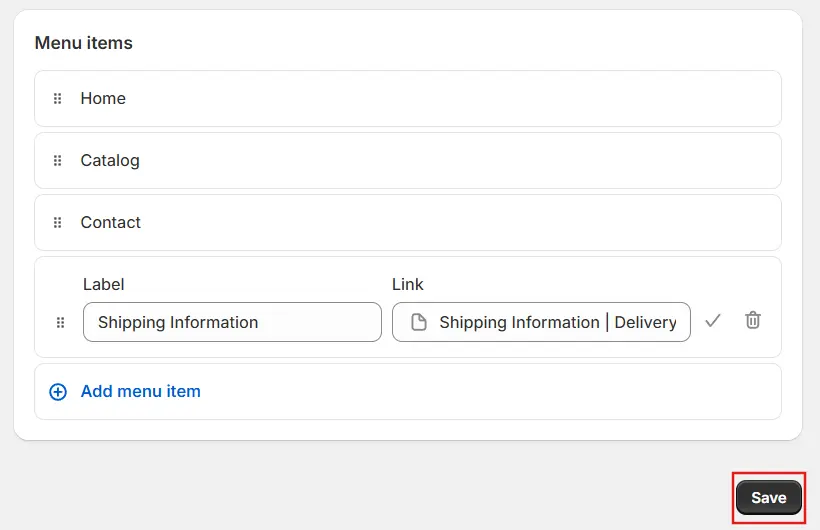
- Click “Save”.
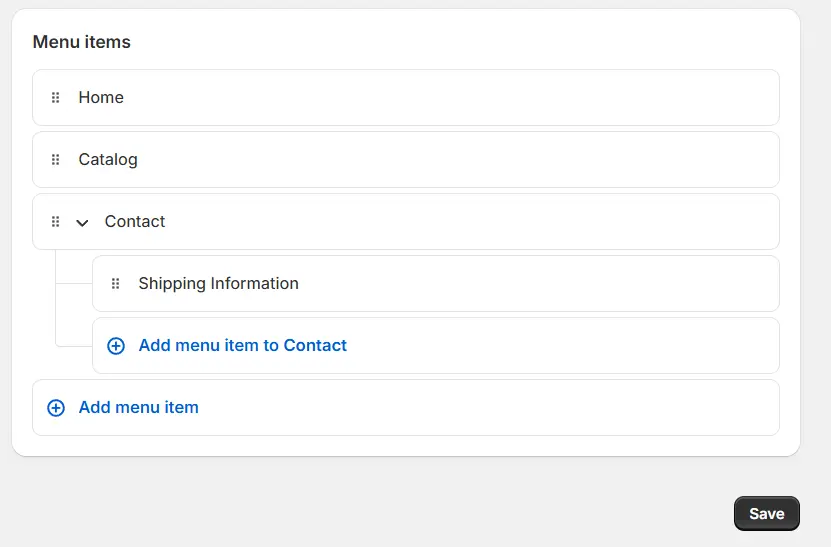
8) Create a dropdown (sub menu) structure:
In the menu editor, drag the new item slightly to the right under a parent item to nest it as a sub page (up to two levels deep, depending on your theme).
9) Save the menu: Click “Save menu” to apply changes.
10) Preview your store: Visit your live site to test the new subpage and navigation.
By following this guide, you will create a structured and user-friendly site that enhances both navigation and SEO.
How to Customize Subpages in Shopify?
Once you have learned how to make subpages in Shopify, customizing them allows you to align the content with your brand. Here’s how to personalize your subpages for a better user experience:
1) Access your Shopify admin: Log in as usual.
2) Go to Pages: Navigate to “Online Store” > “Pages”.
3) Select the page to customize: Click on the title of the subpage you want to edit.
4) Edit content: Use the rich text editor to update text, add media, or insert links. For more control, click “Show HTML” to edit the code directly.
5) Use the theme editor for layout changes:
- Go to “Online Store” > “Themes”.
- Click “Customize” on your active theme.
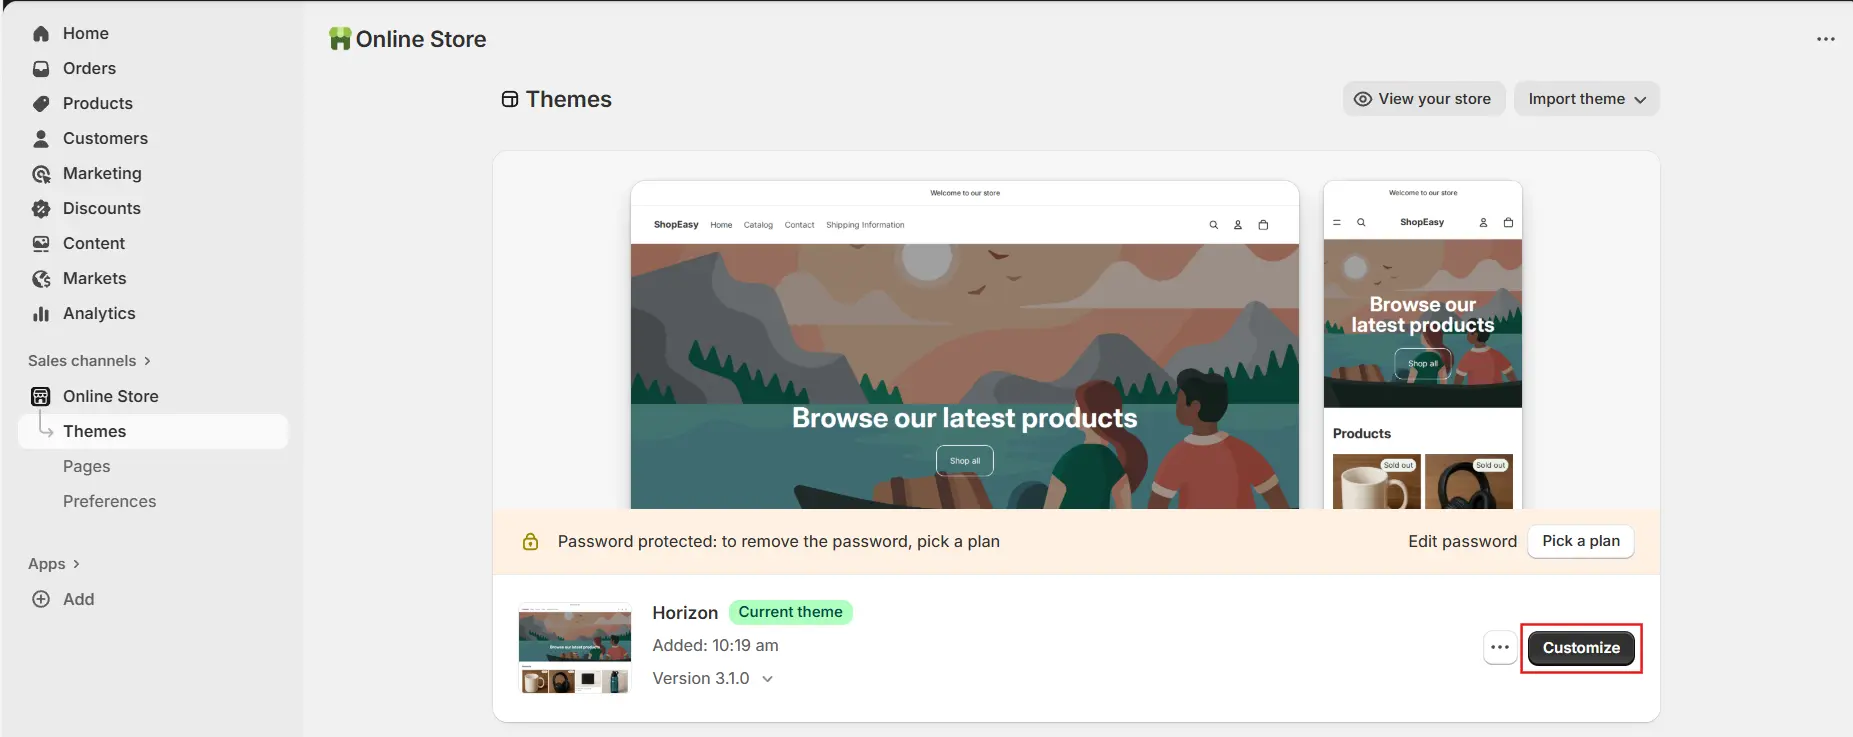
- Select the page template from the top bar.
- Add, remove, or rearrange sections and blocks to adjust layouts.
6) Add dynamic content: If supported by your theme, link metafields or metaobjects for personalized elements.
7) Save your changes: Click “Save” in both editors.
8) Preview your changes: Check your live store to ensure everything looks polished and professional.
Customizing subpages helps create a cohesive brand experience that keeps customers engaged and loyal.
How to Link Subpages to Shopify Menu?
Proper linking is key after you know how to make subpages in Shopify. This ensures your subpages are easily accessible via navigation. Here’s the process:
1) Log in to your Shopify admin: Access your account.
2) Navigate to Menus: Go to “Content” > “Menus.”
3) Select the menu to edit: Choose your target menu (e.g., Main menu).
4) Add a menu item: Click “Add menu item.”
5) Enter menu item details:
- Name: Input the display name (e.g., “Policies”).
- Link: Select “Pages” and choose your subpage.
6) Now, in the menu item: Drag it to the right under a parent item to create a dropdown.
7) Save the menu: Click “Save menu.”
8) Preview your store: Test the navigation on your site.
This method helps by ensuring they are integrated seamlessly into your menu structure.
What are the Important Things to Remember?
When working with subpages in Shopify, keep these enhanced tips in mind to maximize their impact:
- Purpose and Strategy: Subpages should focus on evergreen content, such as About Us, FAQs, or policies. Plan them to support your main store goals, such as increasing trust or reducing cart abandonment.
- Best Practices for Creation: Always use descriptive titles and high-quality content. Incorporate keywords naturally for SEO and ensure mobile responsiveness by testing on various devices.
- Content Quality: Incorporate engaging elements, such as images or videos, while keeping the text concise and scannable with clear headings and bullet points. Update content regularly to reflect changes in your business.
- Navigation and Structure: Organize subpages into logical menus, utilizing dropdowns for a better user experience. Avoid overloading menus, aim for 5-7 main items with subpages nested underneath.
- SEO Optimization: Include the target keyword in titles, meta descriptions, and body text. Use alt tags for images and internal links to connect subpages, boosting search rankings.
- Customization and Branding: Match subpages to your theme’s design for consistency. Use Shopify’s theme editor to add custom sections and consider apps for advanced features like forms or maps.
- Customer-Centric Focus: Prioritize user needs by including clear calls-to-action (e.g., “Contact Us” buttons) and ensuring fast load times. Monitor analytics to see which subpages perform best.
- Legal and Compliance: For policy pages, ensure accuracy to comply with relevant laws, such as GDPR. Consult with legal experts if necessary to avoid potential issues.
- Testing and Maintenance: Preview changes on desktop and mobile, and utilize Shopify’s analytics to track website visits. Regularly audit subpages for broken links or outdated info.
- Scalability: As your store grows, create additional subpages for categories such as blogs or tutorials. Integrate with apps for dynamic content if your theme allows.
These reminders will help you leverage these steps effectively, turning them into powerful tools for your store’s success.
(Source: Shopify Help Center)
Conclusion
Mastering how to make subpages in Shopify is a game-changer for any e-commerce store owner. By following this guide, you have not only learned the basics of creation but also gained advanced tips for customization, linking, and optimization.
Subpages transform your site into a well-organized, trustworthy platform that delights customers and improves SEO. Start implementing these steps today and watch your Shopify store thrive with better navigation and engagement.